
Basic Passive Balance Development Activities For Brain Injured Children
By Douglas Doman

The pioneering Russian neurophysiologist, Boris Klosovskii, demonstrated a century ago that kittens and puppies had greatly increased brain growth in the first ten to twenty days of life when they were exposed to very gentle vestibular stimulation. These kittens and puppies actually had 22.8 percent to 35 percent more brain growth in the balance areas of their brains than did their littermates, who had not received such gentle stimulation.*
Balance is one of the fundamental components of mobility. For this reason we include a Balance Development Program at every level of mobility. For the immobile child, we start with activities that are extremely gentle and pleasurable. The basic purpose is to provide information to the brain so the child knows she is living in a three-dimensional world. These activities can be done for a brain injured child who cannot move, or they can be done with well, neurotypical babies. My son, Marlowe, would consistently stop crying in the first weeks of life if his mother or I began certain balance activities. It was clear almost immediately which ones were his favorites. Children with brain injury respond in the same way.
All of the activities we are about to describe can be done safely and enjoyably with your child. These activities are ideal for little children. For bigger children, we will be teaching you how to do other activities. Obviously, you will want to exercise extreme care and make certain the area you use is free from obstructions. Be sensitive to your child’s comfort. Keep your eyes on the child at all times. Hold your child carefully during those activities for which holding is necessary. Start gradually, slowly, and calmly, and build up the activities.
This means gradually building up the length of time per session. Always tell your child what you are going to do before you do it. Explain to your child what you are doing while you do it. Always stop before your child wants to stop. That way, the child will always be looking forward to the next session. As a symptom of their brain injury, brain-injured children may find it hard to orient themselves at first. If you start very slowly and gently, hopefully your child will enjoy these activities from the very beginning. But it is possible they may be disoriented and cry profusely. This is okay. Make certain they are comfortable. If the pad is correct, they should be comfortable. This means you need to continue the activity slowly and gently. In time they will get used to it. If you continue to persist, they will begin to enjoy it and eventually love it.
Passive balance activities are extremely gentle and quite pleasurable for hurt children.

Isolda enjoys a gentle spin on her father’s shoulder.
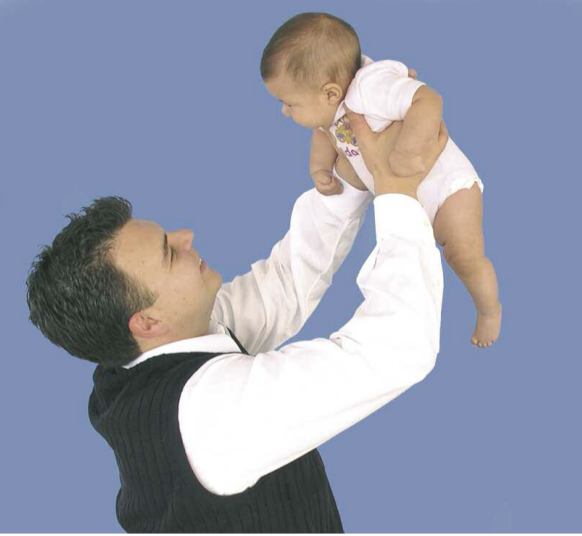
Father lifts Isolda up and down.
You can dress your child in as little or as much clothing as the environment warrants—just be sure you can grasp the child securely with whatever is worn. If your child is heavy for you, it's essential to do these activities on a good quality gymnastics mat.
The best part about doing the balance program with your child is that it’s going to be equally fun for both of you. All over the world, we have observed parents (especially fathers) developing their babies’ balance. We have observed this from the world’s most sophisticated capitals to the most primitive jungles and deserts of the world.
In both extremes of civilization, parents and kids enjoyed it equally. Dads toss their babies up into the air and then catch them. Moms bounce their babies on their knees. Both activities, so simple and so easily done, stimulate the balance, or vestibular, areas of the brain. All parents have their own favorite bouncing and rough-housing activities, but we’ve listed fifteen specific ones that stimulate the balance areas of the brain in recognition of the three dimensions in which we all live.
1. Carry your child around. Carefully hold your child in the following way: Hold your hands palm up and, with one hand, support the back of the child’s head. With the other hand, hold the child’s bottom. Now, simply carry your child around and gently move the child through the air. Move the child up and down, back and forth, and from side to side. Take your child around the house, saying what different rooms and objects are. Have your child touch the objects and walls. Let your child look out the window and touch it.

Mother moves Isolda side to side in the air.

Isolda enjoys moving in all directions with her father’s help.
2. Lie on your back, and move your child through space. This is another activity that we didn’t have to invent—we have observed parents doing it all over the world. Lie in bed on your back. Hold your child in the prone position on your tummy. Grasp the child firmly with one hand on each of the child’s sides, underneath the armpits. Raise the child directly over your chest so that you are eye-to-eye. Tell the child he or she is flying. Gently “bank” your child to the right and left, and raise the child up and down before coming in for a “landing” on your chest.
3. Rock in a rocking chair. Here’s another age-old technique for calming babies. Sit in a rocking chair, and hold your child in the vertical position in your arms (the child should be facing you). Rock back and forth, and then put your child on his or her tummy across your lap while rocking back and forth.
4. Rock on a pillow. Rocking and pitching (see #5) were some of Marlowe Doman’s favorite activities as a child. He did these very effectively on a waterbed (with Mom and Dad’s help), but they can also be done well on a pillow. Place your child on his or her tummy on a large pillow. Have the child face either toward or away from you. Then, gently pick up the side of the pillow with your left hand so that the child rocks to the opposite side. Pick up the other side of the pillow with your right hand, and the child will rock back to the left again.

Mother rocks Isolda side to side on a pillow.
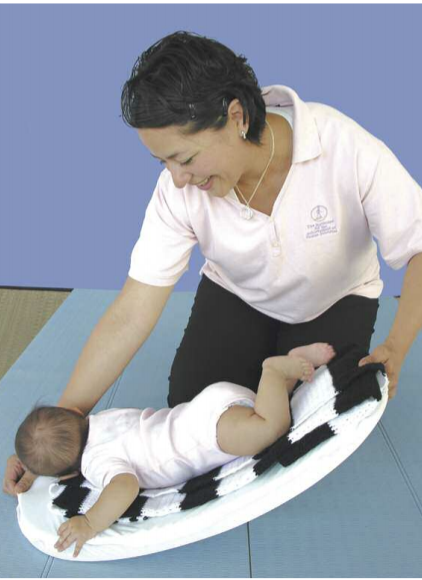
Mother pitches Isolda head to toe on a pillow.
5. Pitching. Rotate your child (still on the pillow) 90 degrees so that he or she faces one of your hands, and so that the child’s feet are extended toward your other hand. Continue to pick up alternate ends of the pillow. Your child is “pitched” from head to toe!
6. Accelerating on a mat forward and backward. This was Marlowe’s favorite activity. Apart from the movement, he loved the sound that the mat made on the carpet. It was guaranteed to stop him from fussing. Buy an inexpensive changing mat (they have plastic covers and foam rubber padding, and are useful for changing your child on the floor). Fold it over to make it more rigid, and place it on the floor. Place your child on his or her tummy on the mat. The child’s body should be perpendicular to yours, with the child’s head at your right hand and the feet at your left hand. Now, with your right hand, pull the mat to the right. The child moves forward. Then, with your left hand, pull the mat to the left. The child moves backward. Your child accelerates forward and backward.

Mother accelerates Isolda backward and forward on a pillow.

Mother rotates Isolda clockwise and counterclockwise as she lies on a pillow.
7. Accelerating right and left. Rotate the mat 90 degrees so that your child is facing you. Pull the mat with your left hand so that the child moves to the right, and then pull with your right hand so that the child moves to the left. This is called acceleration right and acceleration left.
8. Horizontal rotation clockwise. Place your child on his or her tummy lying lengthwise on the mat. The child’s head should be close to the mat’s edge. Take the other end of the mat and rotate it clockwise.
9. Horizontal rotation counterclockwise. Repeat as above, rotating the mat counterclockwise.
10. Horizontal spin, prone position. Stand up, place your child over your shoulder on his or her tummy, and spin around, being careful not to get dizzy enough to lose your own balance. Alternate your spinning direction clockwise and counterclockwise.
11. Horizontal spin, left side. Repeat as above, but with your child placed on your right shoulder on his or her left side so that the child’s tummy is against your neck. Spin clockwise and counterclockwise.
12. Horizontal spin, right side. Repeat the directions as above, but this time, place your child on his or her right side on your left shoulder. Spin clockwise and counter-clockwise.
13. Pitching up and down. Standing or kneeling with your child in the face-up position, carefully hold the child’s head with one hand and bottom with the other. The child is now in a semi-vertical position. Gently lift the child up to eye level, and then gently lower the child’s head. Your child tilts from a vertical position to a horizontal position, and then to a position in which the head is lower than the toes. Repeat.

Mother clasps Isolda close to her body as she trots around the house.

Isolda holds her mother’s thumb independently, as mother rolls her from her back onto her tummy.
14. Rolling. This is a superb balance activity that can be easily combined with an activity for developing manual competence. First, put your child on his or her back on the floor. Kneel down at your child’s feet, which should be positioned so that the child’s toes touch your knees. Let the child grasp the index finger of your left hand in his or her right hand. Say “pull,” and gradually pull the child’s right hand with your left hand so that the child rolls over onto the left side, and then onto the tummy. Now, let the child grasp your right index finger in his or her left hand. Hold the child’s hand over the head, and pull the child so that he or she rolls over onto the right side, and then onto the back. When doing this, be careful that you don’t put the child’s left arm in an uncomfortable position. Continue in this fashion, rolling the child over, first to the left and then to the right.
15. Trot about with your child. Carefully hold your child to your body, and gently trot through the house. The child will feel your body moving up and down while being carried. As the child develops and gains control of the head and back, you can run faster and vary the positions in which you hold him or her. The child is seeing the world in yet another way.
Doing the Basic Balance Program with Your Child
Frequency
A basic daily program consists of doing each one of the fifteen activities at least once a day.
Intensity
Move slowly and carefully in each of the activities. If, by chance, your child isn’t enjoying an activity (or if you get fatigued), you are probably going too quickly. Slow down.
Duration
Begin with about fifteen seconds of each of the activities, and gradually and carefully build up to one minute for each of them.
Total time for basic daily program: Fifteen minutes minimum.
For older children you can double or triple the total time to thirty minutes or forty-five minutes, respectively.
* B. N. Klosovskii, The Development of the Brain, translated from the Russian and edited by Basil Haigh (New York: Macmillan, 1963).